
Table of Contents
Why should you choose cloud backup software for personal use?
In our daily life, many people must have experienced the problem of losing data such as photo and video loss due to device failure, file corruption, etc. Creating cloud backup for your important data not only allows you to access it via an Internet-connected device but also recover it from the cloud using the restore feature.
Cloud backup, also known as online backup, is the process of backing up data to a cloud-based remote server. Compared with local backup, cloud backup has many advantages:
- No storage device is required.
- Data transfer is fast and can be completed as long as there is a network.
- Data backed up to the cloud is encrypted before being sent to the cloud storage server.
- Cloud storage space usually can be expanded for your needs.
What is the best free personal cloud backup software?
Wondering what the best personal cloud backup software is? We recommend you use CBackup, a free cloud backup service for all your backup needs. With this backup tool, you can perform cloud backup for your personal data decently and easily.
√It gives you the ability to back up to Google Drive, Dropbox, OneDrive, CBackup Cloud, and more clouds on one platform.
√It offers flexible schedule backup plans for you to backup files daily, weekly, or monthly.
√You can quickly and freely restore file backups whenever you need them.
√It is easy to use and applies 265-bit AES encryption for data transfer.
√In addition to files and folders, it allows you to backup hard drives, computers, and system files.
How to create personal cloud backup with the best backup software
Step 1. Create a new account for CBackup on its website. Then, log in to its desktop application with the account.
Step 2. Select the Storage tab on the left side, click on the cloud drive, which you want to save personal backups, and hit the Authorize Now button to permit CBackup to access your cloud storage.

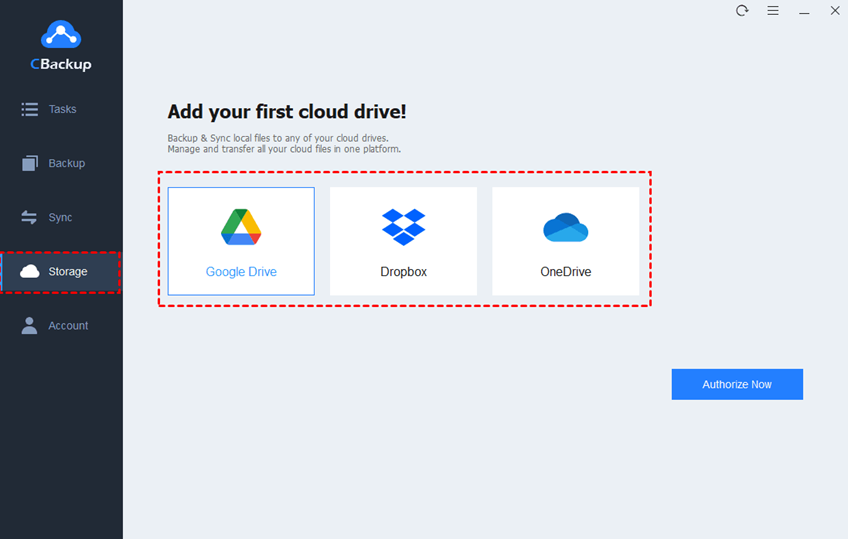
◆Note: If you don’t want to add public clouds to CBackup, you can directly select Backup > Backup PC to CBackup Cloud to save data backups on CBackup Cloud directly, which gives 10 GB of free backup space for every account and scalable storage space.
Step 3. Select Backup and tap on Backup PC to Public Cloud.


Step 4. Pick files and folders for backup and choose an added cloud drive as the destination path. Then, click Start Backup to create an instant cloud backup for your data.

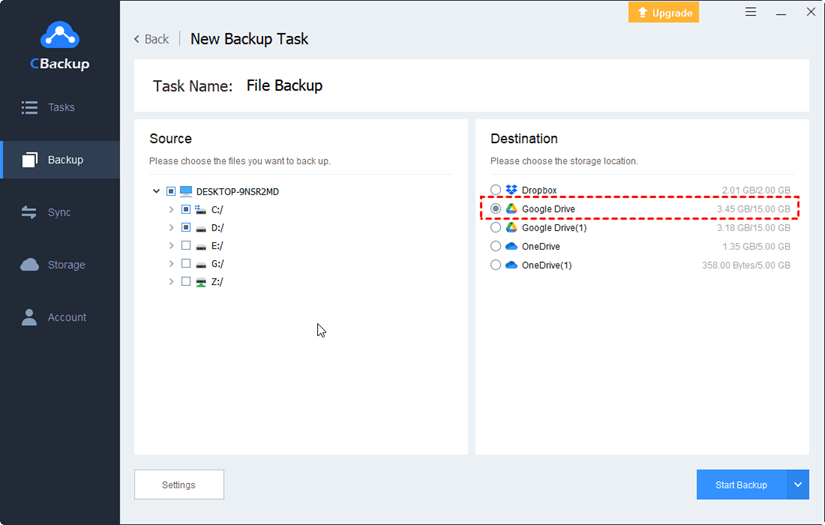
You can set up auto backups for data, like OneDrive schedule backup, by clicking Settings and selecting an appropriate backup schedule, then clicking OK to confirm it before starting a backup task.
How to restore cloud backups from CBackup
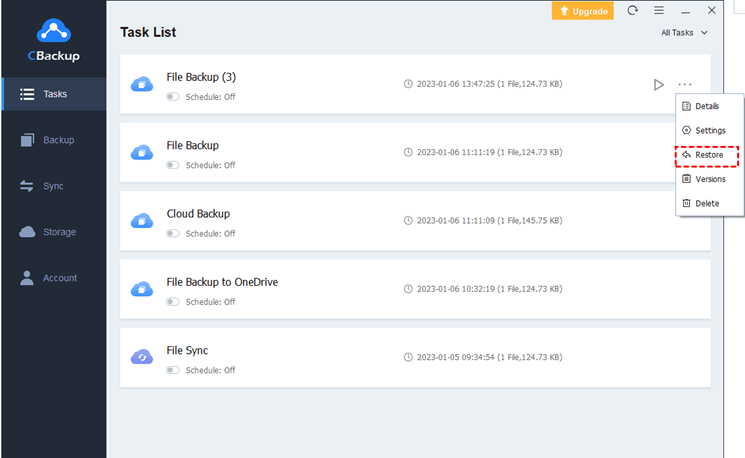
Step 1. Navigate to the backup task on the Tasks screen that contains files you need to restore, and click on the three dots position. Then, choose Restore.

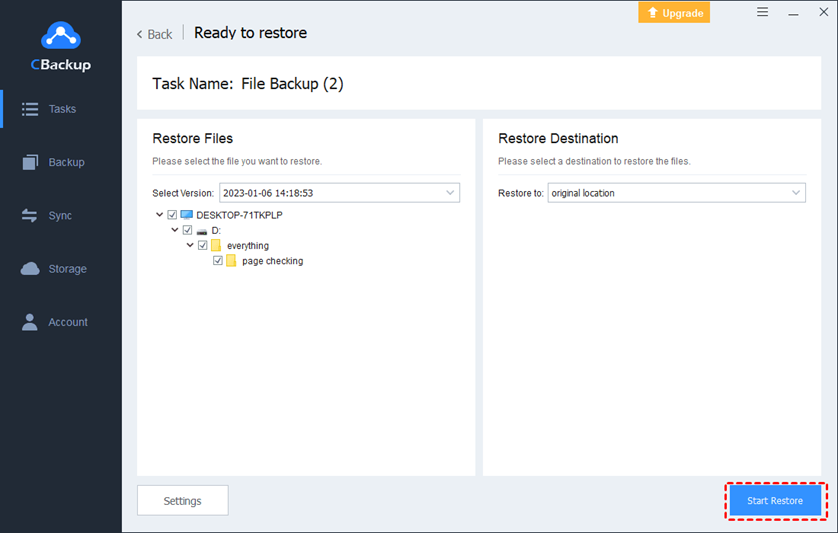
Step 2. If there are multiple backup versions, open the drop-down menu of Select Version to select the right backup version.
Step 3. Choose files to restore and select to restore them to the original location or a new path.
Step 4. Confirm the restore settings and click on Start Restore.

More powerful features of CBackup that can help you:
Cloud to Cloud Backup/Sync: It supports you to migrate data from one cloud to another quickly and seamlessly without downloading and uploading.
File Filter: The File Filter feature of Cbackup allows you to only contain certain types of files or exclude certain types of files for backup with ease.
Email Notification: You can monitor the data backup status by setting an email notification.
Cloud Storage Combination: It enables you to merge multiple or even unlimited cloud accounts to gain 1TB free cloud storage or more with ease.
Summary
Since computer files are prone to loss due to various reasons, your data is not safe there. Therefore, you need a cloud backup tool to save them online for protection. With the free cloud backup utility CBackup, you can create Windows 10 backups, hard drive backups, and individual file backups to Google Drive, OneDrive, and multiple cloud drives without any obstacles.


Alex is fascinated with “understanding” people. It’s actually what drives everything he does. He believes in a thoughtful exploration of how you shape your thoughts, experience of the world.